The post Parallels Desktop 20.2: another exciting update in the Parallels Desktop 20 series appeared first on Parallels Blog.
]]>I’m excited to unveil Parallels Desktop 20.2.0, the third major release in the Parallels Desktop 20 series—all delivered in just four months!
At Parallels, we’re committed to bringing you powerful, user-focused features designed to bring some value to your everyday work and play.
In this update, we’re introducing innovations for every type of user, whether you run Windows apps on your Mac, manage large-scale IT deployments, or dive deep into development and testing.
Let’s take a closer look at what’s new!
I’m proud to share a significant milestone — starting with Parallels Desktop 20.2.0 you can use x86 emulation on Apple silicon Macs.
This functionality allows you to run some Intel-based (x86_64) virtual machines (VMs) on Apple silicon Macs via our proprietary emulation engine.
Since we first introduced Parallels Desktop 16.5 with support for Apple silicon Macs, the ability to run x86_64 virtual machines has been a limitation.
And today, after months of hard work, we’re releasing this early technology preview for tech enthusiasts who want to explore its potential.
We listened to your feedback — it’s important to us!
Many users have reached out to us and requested the ability to run, develop, and test 32-bit Windows apps in a native environment.
Some of you also asked for the ability to run x86_64 Linux virtual machines as an alternative solution to running Linux virtual machines through Rosetta.
That is why you now can:
* Running x86_64 Windows 11 24H2 virtual machines through x86 emulation isn’t supported currently due to the absence of SSE (Streaming SIMD Extensions) 4.2 support.
Since the functionality is in the early technology preview stage, it has some significant limitations:
You can find more details about the functionality and its limitations in this article.
Please note that we’ve hidden the option to start a virtual machine in our UI to avoid false expectations for the majority of users who don’t actually need it.
I know it’s not a complete solution yet, but I wanted to give you a first look and invite you to share your feedback with us on our Forum or through Support.
It’s important for us to better understand your workflow and what we can do to enhance the feature for your needs.
We’re making it easier to manage macOS virtual machines on Apple silicon Macs with the introduction of automatic time and time zone sync.
Why is this important?
Previously, when creating a new macOS VM on Apple silicon, users had to manually set the time and time zone, adding extra steps to the setup process.
Starting with Parallels Desktop 20.2, this sync happens automatically once you install Parallels Tools.
We made a promise—and we kept it.
Parallels Desktop Enterprise Edition with the new Management Portal that was recently released, and with it we’re making license management smarter and more flexible.
Organizations that utilize a corporate identity provider (e.g., Microsoft Entra ID, Okta, etc.) can use it to automate license management of Parallels Desktop licenses and enable single sign-on (SSO) capabilities.
IT admins no longer need to manually disable unused licenses.
If an end-user is inactive and doesn’t log in for a month, the license seat is automatically revoked from this user and made available for another user.
The same happens when a user leaves the organization.
The activation process is super simple. Your end users just need to enter their corporate email and voila—the product is activated.
You can also link groups in your identity provider to sublicenses in Parallels My Account to get more visibility over the license keys.
But that’s not everything I wanted to share.
With this update, IT admins and managers have greater flexibility in managing the license keys.
They can allow one group of users to sign in through SSO while enabling other groups to activate Parallels Desktop using a license key.
More details can be found in the Parallels Desktop Enterprise Edition Guide.
As of now, you can easily deploy the Parallels Desktop application from the MDM App Catalogs and deliver information about the Parallels Desktop activation experience with the help of configuration profiles.
Configuration profiles can be created right from the iMazing Profile Editor app.
Simply choose how end users will activate—with a license key or via SSO.
Once the profile is created, push it to the end users’ Macs and Parallels Desktop will apply this configuration the next time they start up.
Delivering Parallels Desktop settings can be done through the Parallels Desktop Management Portal (available in Parallels Desktop Enterprise Edition).
The option to deploy the Parallels Desktop application, virtual machines, licensing information, and the settings using the deployment package is still available.
In response to the request from IT administrators, the Parallels Team has implemented support for managing the activation experience on managed Macs.
Once the configuration profile is deployed to the target Macs, if an end user tries to activate the Mac using a different key, Parallels Desktop will automatically reactivate with the key defined in the configuration profile.
It will also prompt the user to sign in with SSO based on the selected activation method. As a result, IT admins can ensure the end users get the proper experience and don’t face any challenges with activating Parallels Desktop, even if the product is uninstalled and reinstalled later.
I’m excited to share that Parallels Desktop is the first end-point virtualization solution that offers this kind of functionality.
We’ve made it even easier to use Writing Tools powered by Apple Intelligence with your favorite Windows apps. Now you can access them directly from the context menu in:
This integration makes polishing your text smoother than ever, whether you’re editing emails, documents, or presentations.
The 20.2.0 update also includes a range of fixes to enhance the overall stability and reliability of Parallels Desktop.
We’ve addressed key issues reported by users to ensure a smoother and more seamless experience. Learn more here.
New to Parallels Desktop for Mac? Get your 14-day free trial of Parallels Desktop now.
The post Parallels Desktop 20.2: another exciting update in the Parallels Desktop 20 series appeared first on Parallels Blog.
]]>The post Guide to Apple’s M chips: M1, M2, M3, and beyond appeared first on Parallels Blog.
]]>Introduced in November 2020, the M1 chip was the first one designed exclusively for macOS.
Its speed, efficiency, and power have provided a notable boost to the complete Mac experience.
Before the M1 release, Apple used Arm technology in its iOS devices (iPhone and iPad). Arm chips were used in Macs from 2016 to 2020 and are still commonly used in Windows machines.
Still, the M1 chip delivers faster performance and exceptional power efficiency, including a 2X longer battery life.
Following the successful release of M1, Apple unveiled the M2 chip in 2022, the M3 chip in 2023, and the M4 chip this past May.
It’s a safe bet that the M5 chip will be released in 2025. Of course, it’s expected to be faster than all its M series predecessors.
Try Parallels Desktop for Mac and run all your favorite apps on the M chip Apple computers, including Windows-exclusive apps.
There are significant differences among M chip versions, each with generation-over-generation updates and improvements. Let’s take a closer look:
Released in 2020, the first M1 chip integrates the CPU (central processing unit) with the GPU (graphics processing unit) on a single piece of silicon. Consequently, enabling it to perform faster and extend MacBook’s battery life.
Johny Srouji, Apple’s Senior Vice President of Hardware Technologies, said at the M1 announcement, “There has never been a chip like M; our breakthrough SoC (system on a chip) for the Mac.
It builds on more than a decade of designing industry-leading chips for iPhone, iPad, and Apple Watch, and ushers in a whole new era for the Mac.”
The M1 chip is available in MacBook Air, MacBook Pro, Mac Mini, and iMac models.
The M1 Pro offers increased performance with more CPU and GPU cores, making it 70 percent faster than the M1.
A PC chip’s peak performance paled compared to M1 Pro’s 1.7x higher CPU performance while using less than 70 percent power.
The M1 Pro chip’s integrated graphics performed 7x faster than the 8-core PC laptop chip with its 16-core CPU.
The M1 Pro is available on MacBook Pro, Mac Mini, iMac, and iPad Pro.
When it launched in the fall of 2021, the M1 Max was the largest chip Apple had ever built.
With a 10-core CPU similar to the M1 Pro, it added an impressive 32-core GPU, making its graphics processing capabilities 4x faster than the original M1.
It performed like the highest-end GPU for the largest PC laptops but required far less power.
The M1 Max allows for faster performance while it generates less heat and uses quiet fans.
The M1 Max is available on MacBook Pro and MacBook Studio models.
In the M1 series, M1 Ultra is the M chip on steroids.
It is the UltraFusion packaging of two M1 Max dies, thus creating a powerful system on a chip.
As a result, it produces 2.5 terabytes of bandwidth—four times higher than its competing PC.
Mac M1 Ultra is exclusive to Mac Studio, providing access to apps designed for iPhone and iPad plus universal apps.
Launching the next generation of Apple’s silicon, the M2 is exclusively designed for Macs.
Like its M1 predecessor, it maintained its focus on power and efficiency and delivered a CPU, GPU, and Neural Engine.
The SoC design of M2 has 50 percent more bandwidth than M1, with up to 24GB of fast unified memory, enabling it to handle larger and more complex workloads.
The M2 chip is available on MacBook Air, MacBook Pro, Mac mini, iPad Pro, and Mac Studio.
The M2 Pro is available on the Mac Mini and the MacBook Pro.
M2 Max is the answer for users who require heavy media tasks.
The M2 Max was the most powerful chip Apple put in a laptop until the M2 Ultra debuted. It has the power to function in GPU-in-depth tasks and machine-learning applications.
The M2 Max is available on MacBook Pro and Mac Studio.
Inspired by its precursor, the M1 Ultra, the M2 Ultra is created from two M2 Max chips with UltraFusion technology.
It offers scaled-up workflows, transcodes, exports video, runs intricate particle simulations, and works within 3D environments.
When the M2 Ultra chip was released in June 2023, it made the new Mac Studio and Mac Pro the most powerful Mac desktops ever released up to that point.
The M2 Ultra is available on Mac Studio and the Mac Pro.
The M3 series was released in the fall of 2023, introducing the first three-nanometer technology.
Apple surprised the industry by releasing the three models all at once, rather than their usual practice of releasing them in waves.
Laura Metz, director of Apple’s Mac product marketing team, stressed how important it was for the M3 series to democratize features and ensure they are accessible to all users while also building their systems for real-life workloads.
The M3 chip series introduced the Apple 3nm (or 3-nanometer), allowing more transistors to be packed into smaller spaces while elevating speed and efficiency.
The devices with M3 chips include the MacBook Air, MacBook Pro, and the iMac.
The M3 pro streamlines workflows for creatives, coders, and researchers. This efficiency was accomplished by making the GPU 40 percent faster than the M1 Pro.
The MacBook Pro comes with the M3 Pro chip.
The M3 Max is designed for users who require complex applications like 3D graphics and video editing due to its architectural improvements to the performance and efficiency cores.
Despite the success of its predecessors, the M1 and M2 Ultra, and anticipation for the M3 Ultra, Apple scrapped releasing it. Instead, they skipped over this version and went straight into the M4 chip series.
In May 2024, Apple released the iPad Pro powered by an M4 chip, making it the second-generation three-nanometer technology.
The M4 series comes with advanced machine-learning features for future software releases.
Building on the M series legacy, the M4 offers power-efficient performance while making the iPad Pro the most powerful device of its kind.
Devices with M4 chips include iPad Pro, iMac, Mac Mini, and the MacBook Pro.
The M5 chip is anticipated for release in 2025, leaping further into performance efficiency.
At this time, Apple has not shared what M5 will bring; however, it is expected to continue to build off the previous series.
There are speculations that new iterations like the Pro, Max, and Ultra will follow the M5.
It is worth pointing out that all the M series chips are 100% carbon neutral, aligning with Apple’s carbon neutral plan to have net-zero climate impact across its business by 2030.
Parallels Desktop allows Mac users to run Windows, Linux, and more on all M chip Macs.
As the only Microsoft-authorized solution running Windows on Macs with Intel and Apple silicon, the Parallels Desktop team continues to collaborate closely with Apple to bring our millions of users with the latest updates so that they can feel confident investing in their Mac.
Elevate your Mac experience running Windows and Windows applications. Choose from over 200,000 apps to work, study, and play.
Want to try it for yourself? Get your free trial of Parallels Desktop now.
The post Guide to Apple’s M chips: M1, M2, M3, and beyond appeared first on Parallels Blog.
]]>The post Cut the clutter: Streamline access to Parallels Desktop with SSO appeared first on Parallels Blog.
]]>Single Sign-On (SSO) capabilities are essential in simplifying access while maintaining high security standards.
For companies using Parallels Desktop, SSO integration offers a seamless way to manage virtual machine environments across a wide range of devices without sacrificing security or user experience.
I’ll explore how Parallels Desktop leverages SSO to streamline access management and why it’s a game-changer for IT departments.
Ready to learn more? Contact us today to explore how Parallels Desktop can enhance your virtual environment management with SSO capabilities.
One of the primary advantages of SSO is the simplified user experience it provides.
With SSO, employees can use their existing corporate credentials to access Parallels Desktop and virtual machines.
This simplicity eliminates the need to remember and manage multiple passwords, reducing login friction and boosting productivity.
A consistent authentication experience also helps create a smoother workflow for both new hires and seasoned staff, allowing them to get to work without delay.
Security is a top concern for any IT department, and SSO helps address that by centralizing authentication.
Parallels Desktop’s SSO capabilities integrate with your existing identity management tools, such as Microsoft Active Directory, or cloud-based solutions like Azure AD.
This integration ensures that only authorized users can access your organization’s virtual machines and sensitive information.
IT admins can enforce stronger authentication methods, like multi-factor authentication (MFA), adding an extra layer of security for user accounts.
Managing user accounts across various applications can be a time-consuming task for IT teams.
With Parallels Desktop Enterprise Edition, administrators can manage access to Parallels Desktop and other applications from a single, centralized platform.
When employees leave the organization or change roles, their access to Parallels Desktop can be adjusted or revoked from one location, simplifying the offboarding process and reducing the risk of unauthorized access.
Parallels Desktop Enterprise Edition is designed to integrate smoothly with the SSO tools your organization already uses.
Whether you rely on cloud-based identity management systems, on-premises solutions, or hybrid environments, Parallels Desktop’s SSO integration works with a variety of platforms.
This flexibility allows IT departments to extend their existing security framework to include virtual machines without investing in additional infrastructure or tools.
Integrating SSO with Parallels Desktop is a straightforward process. Here’s a quick overview of how it works:
Parallels Desktop can be configured to connect to your organization’s identity provider (IdP), such as Okta, Ping Identity, or Microsoft Azure.
This connection allows the system to authenticate users based on their existing credentials.
When a user attempts to access Parallels Desktop, they are redirected to the corporate login page associated with your IdP.
After successful authentication, the user gains access to Parallels Desktop and any authorized virtual machines without needing to log in separately.
IT administrators can set policies and access controls through the IdP, dictating who has access to Parallels Desktop and under what conditions.
For example, you can enforce multi-factor authentication or restrict access to certain VMs based on user roles.
Integrating SSO with Parallels Desktop provides a seamless and secure way to manage access to virtual machines.
It simplifies the user experience, strengthens security, and reduces the administrative burden on IT teams.
As your organization grows, leveraging SSO will ensure that your virtual environments remain secure, accessible, and efficient for everyone in your company.
Implementing SSO with Parallels Desktop is a significant step forward in aligning your organization’s IT strategy with modern security and access management best practices.
Ready to learn more? Contact us today to explore how Parallels Desktop can enhance your virtual environment management with SSO capabilities.
Explore the future of access management with Parallels Desktop Enterprise Edition!
The post Cut the clutter: Streamline access to Parallels Desktop with SSO appeared first on Parallels Blog.
]]>The post Chromebook vs laptops: A comparison appeared first on Parallels Blog.
]]>Chromebooks can’t do everything many laptops can, but if you just need a basic machine, they may meet your needs.
A Chromebook is a budget laptop that does not run macOS, Linux, or Windows; instead, it operates on a Google-based operating system called ChromeOS.
Chromebooks were first released in 2011; since then, they have become sleeker and more feature rich.
Both Chromebooks and laptops have their unique strengths and weaknesses. Being familiar with each option’s capabilities will make it easier for you to determine which one is right for you.
Are you interested in getting a Chromebook, but don’t want to give up your favorite Windows apps? Access them directly on your Chromebook with Parallels Desktop.
The operating system is where the most significant difference in user experience between a Chromebook and a laptop lies. If you are used to Windows, macOS or Linux, the Chromebook operating system will be a big change.
Chromebooks run on Google’s ChromeOS (hence the name), which is much more minimalistic and doesn’t have all the same functionalities you’ll find on Windows, macOS or Linux.
A laptop, on the other hand, runs on the built-in operating system or the one that you choose—either Windows, Linux or macOS—depending on the type of laptop.
In other words, a laptop is not limited to one specific operating system like a Chromebook.
Laptops are like high-performance machines, meaning that they pack some serious hardware under the hood.
Depending on the kind of laptop, powerful processors, large amounts of RAM, and perhaps a dedicated graphics card for gaming or creative work may be part of the package.
What does all that power cost? Battery life.
While some laptops can last all day on a charge, others may need a power outlet sooner than you’d like, especially if you’re pushing them hard.
Chromebooks are completely different.
If you’re currently a laptop user who’s all too familiar with the struggle of finding an outlet mid-work, this might be where Chromebooks start to pique your interest.
Since the hardware in Chromebooks is more minimalistic, the battery life is significantly longer than that of laptops.
Many Chromebooks can last up to 12 hours on a single charge.
This super battery makes Chromebooks perfect for students who spend long days on the go, hopping in between classes, or lying at home wanting to binge-watch a whole season without having to worry about locating the nearest outlet.
When it comes to software and apps, a laptop equals full access to the software and apps you need.
Regardless of what operating system you are running, a laptop gives you the full ability to run the desktop version of programs like Microsoft Office, Adobe Creative Cloud, or even more resource-intensive software that requires some serious computing muscle.
Unlike the web or mobile apps, these desktop versions are built for power users, giving laptops a unique edge when it comes to getting things done without compromise.
Chromebooks, however, take a simpler, cloud-based approach.
With access to the Google Play Store, where you can download Android apps, Chromebooks provide just the essentials and nothing more.
The result is an experience that’s not as feature packed as a laptop’s, but the necessities are covered. But with virtualization tools, you can further enhance that experience.
If you’re using a laptop, you have the power to decide when and how updates happen.
Maybe you’re in the middle of a big project and don’t want to deal with system updates right now—you can easily delay them until you’re ready.
Laptops running Windows or macOS usually bring feature-rich updates, new tools, improved security, and performance tweaks.
However, Chromebooks take a “set it and forget it” approach. They handle the updates for you, but that also means you don’t get to choose when it takes place.
If you prefer a no-hassle, automatic process that doesn’t ask for permission every time, a Chromebook might feel like a breath of fresh air.
Picture your office setup: You’ve got a second monitor, a mouse, an external hard drive, and perhaps even a printer plugged into your laptop.
With many different ports, this setup is exactly what laptops are built for. They are able to handle just about any external device you throw at them.
Chromebooks can join the party, too, though with a simpler setup.
Many support wireless devices like printers or Bluetooth accessories, and some even offer USB ports for external drives.
If you’re mostly printing a paper here and there or connecting your Bluetooth headphones, a Chromebook has you covered.
But if your workspace looks like a control center with wires and gadgets everywhere, a laptop’s got the muscle to keep up with all your gear.
With a laptop, the customization options are endless, and it all comes down to how you want to shape it.
Are your creative projects or games draining your memory?
Go ahead and upgrade the RAM. Running out of space?
Swap out the hard drive for something bigger.
A Chromebook is more like a reliable car that doesn’t need much tinkering. They are simple, and what you see is what you get.
Of course, there is still ample opportunity to personalize aspects like your browser setup and apps, but if you are someone who loves to open up the hood and tweak the engine, so to speak, laptops are the better bet.
If you just want something that works without needing to pop it open for an upgrade, a Chromebook fits the bill perfectly.
There is no denying that Chromebooks take the cake when it comes to being budget friendly.
If you’re looking for a device to handle everyday tasks like sending emails, writing up notes, or streaming a couple of videos here and there, it is hard to beat the value of a Chromebook.
So, if your wallet is the one deciding whether it’s going to be a Chromebook or laptop, it looks like the Chromebook wins.
That being said, laptops also span the price spectrum, and there is something for everyone, as not everything has to be a high-performance powerhouse.
Laptops come in many shapes and sizes, and it is possible to find affordable options that can handle day-to-day tasks such as web browsing and emailing, as well as more extravagant ones that can do anything from editing your next long-form movie to running hardware-intensive games.
Chromebooks have carved out a niche for themselves thanks to their affordability, simplicity, and focus on cloud-based services.
There are many benefits for students, creative professionals or IT managers when choosing a Chromebook, so let’s dive into some of the key reasons.
If keeping things simple and straightforward is your jam, Chromebooks are for you.
With their lightweight operating system, you can dive straight into your tasks without the stress of complicated setups or constant software updates.
It’s perfect for users who primarily need access to Google’s suite of tools like Google Docs, Sheets, and Drive.
Chromebooks are designed to get you from powered off to fully working in seconds.
The interface is clean and intuitive—ideal for anyone who wants to skip the tech headaches and just get stuff done.
No more unnecessary clutter or overly complicated software installations, as Chromebooks keep it refreshingly simple.
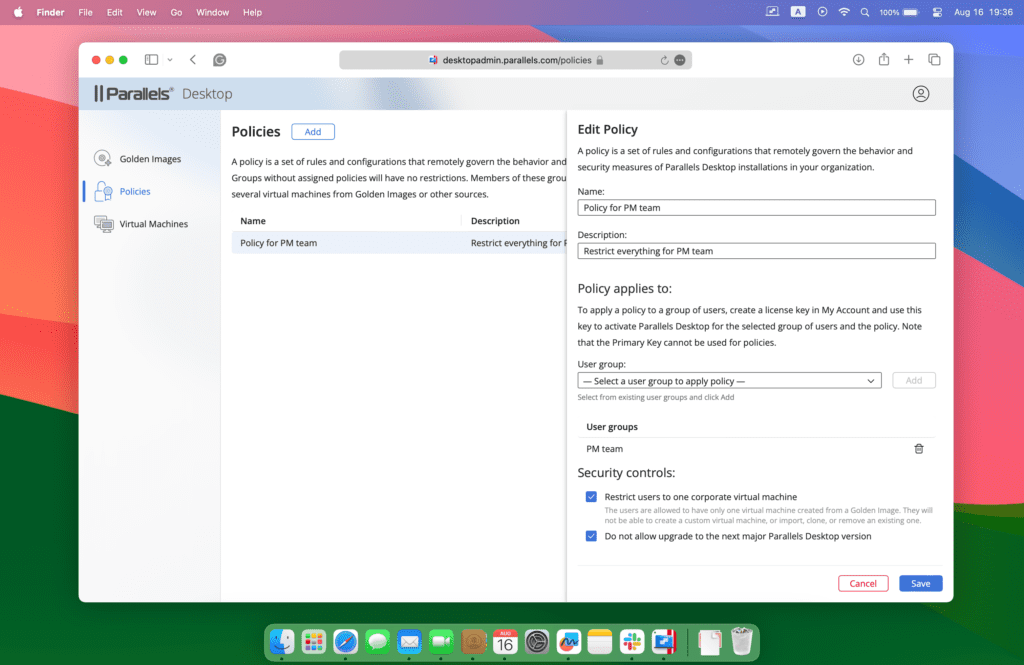
For organizations, the decision to roll out Chromebooks often comes down to one word: budget. Chromebooks offer a cost-effective solution for equipping large teams without sacrificing the essentials.
IT leaders love them for the central management features, which make it super easy to deploy, update, and secure multiple devices through Google’s Admin Console.
Chromebooks are low maintenance, easy to manage, and keep costs down.
The affordability extends to education, too, where schools and universities find Chromebooks are a great fit for students and faculty alike.
Many find that Chromebooks hit the sweet spot between cost and functionality.
Sure, you can find premium models that run upwards of $700, but many students opt for budget-friendly Chromebooks under $200 that handle word processing, web browsing, and video streaming like a charm.
One thing Chromebooks have mastered is battery life.
With most models being able to last up to 12 hours on a single charge, Chromebooks are perfect for long workdays, study sessions, or work on the go.
If you’re a student with a busy schedule full of lectures and homework on campus, Chromebooks let you get through the entire day without having to panic about where the nearest outlet is.
For professionals, it means staying productive without lugging around a charger.
The short answer? Not quite.
While Chromebooks are fantastic for basic tasks like browsing the web, streaming videos, or taking notes, they do fall short in certain areas compared to traditional laptops.
For example, if you need to run heavy-duty software for photo or video editing or a program like AutoCAD for 3D modeling, a Chromebook just won’t cut it.
Apps like these require more processing power and storage than the average Chromebook is able to handle.
Laptops, on the other hand, can run these programs smoothly, making them a better option for anyone who works with resource-intensive applications.
Then there’s storage.
If you’re working with large files such as photos, videos, or design files, a laptop with a big hard drive is your best bet.
Chromebooks usually come with limited local storage and rely on cloud services.
And let’s not forget gaming.
If you’re into serious gaming, most Chromebooks won’t support the high-end games you can play on a laptop.
So, if your weekend plans involve playing the latest AAA titles, you’ll need a laptop to get the job done.
That being said, as the selection evolves, you will be able to find some gaming Chromebooks that will perform better for gaming than the average Chromebook.
Many of us have probably used a laptop before, but not everyone has experience with a Chromebook and may not be familiar with its settings and features.
If you’re interested in trying out a Chromebook, one of the benefits is its simplicity and user-friendliness, making it easy to get started.
Here are some tips on how to use your Chromebook:
First things first: Switch your Chromebook on, then select the language of your choice.
Once you do that, connect to a Wi-Fi network near you, allowing you to set up a Gmail account or log into your existing account.
Your Gmail account is what allows you to access the Play Store and get the apps you need.
After signing in, you can download your desired apps from the Google Play Store.
Click on the settings icon, which will take you to a tab with several commands.
Look for the “Google Play Store” command that allows your device to install apps from the Google Play Store and click on it.
You will then see a list of terms of use.
Read through them and then click on “Accept.” Once you do that, your device will be set up and ready to use.
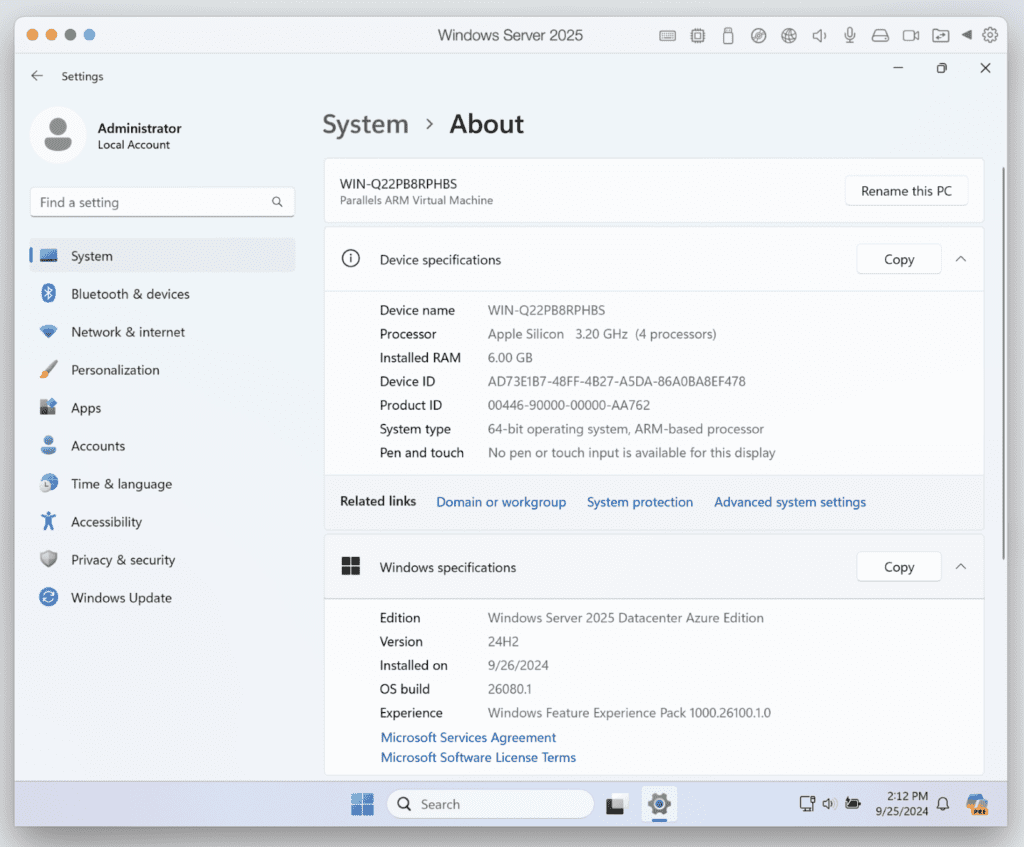
Thanks to virtualization software like Parallels Desktop, you can run Windows on your Chromebook, opening a world of new possibilities and convenience.
Chromebooks are built to run on Google’s ChromeOS, so you’re usually limited to web-based apps and Google tools.
However, with Parallels Desktop, you get the best of both worlds.
You can easily switch between ChromeOS and a full Windows experience, giving you access to Windows-only programs like the full Microsoft Office suite or even something like Photoshop.
Whether you’re a student who needs to run a specific Windows app for a class or a professional who occasionally needs access to more powerful software, Parallels Desktop lets you handle it all from one device.
No need for extra gadgets or juggling two computers—just flip between Chrome and Windows whenever you need it.
There are some minimum system requirements to run Parallels Desktop on your Chromebook.
The systems need to be at least ChromeOS version 85 or later.
It helps if you also have a Google Admin console, Microsoft Windows, Chrome Enterprise Upgrade, and a corporate storage server.
The hardware supported includes processors such as Intel Core i5 or i7 and AMD Ryzen 5 or 7.
Ensure the systems have a minimum of 8 GB RAM and 128 GB SSD ROM on the devices.
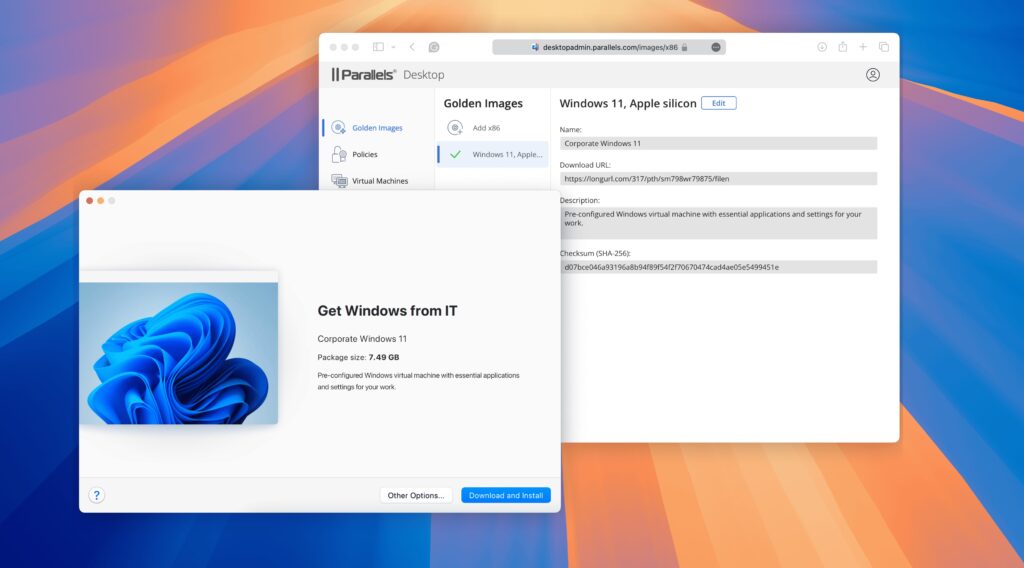
Although Windows is not natively supported on Chromebooks, it is actually possible to install Windows on Chromebook using Parallels Desktop and run most Windows applications directly on your Chromebook.
Here’s is a step-by-step guide on how to get started:
1. Use your system administrator to sign in to your Chromebook.
2. Proceed to choose “Launcher.”
3. Navigate to Parallels Desktop and click.
4. When the “Set up Parallels Desktop on your Chromebook” dialog window opens, click on “Install.”
5. Wait for the Parallels Desktop Windows image to download.
6. After downloading, click the “Launch” button to start Windows.
7. Windows will start automatically, and you can run all the Windows applications you need on your Chromebook.
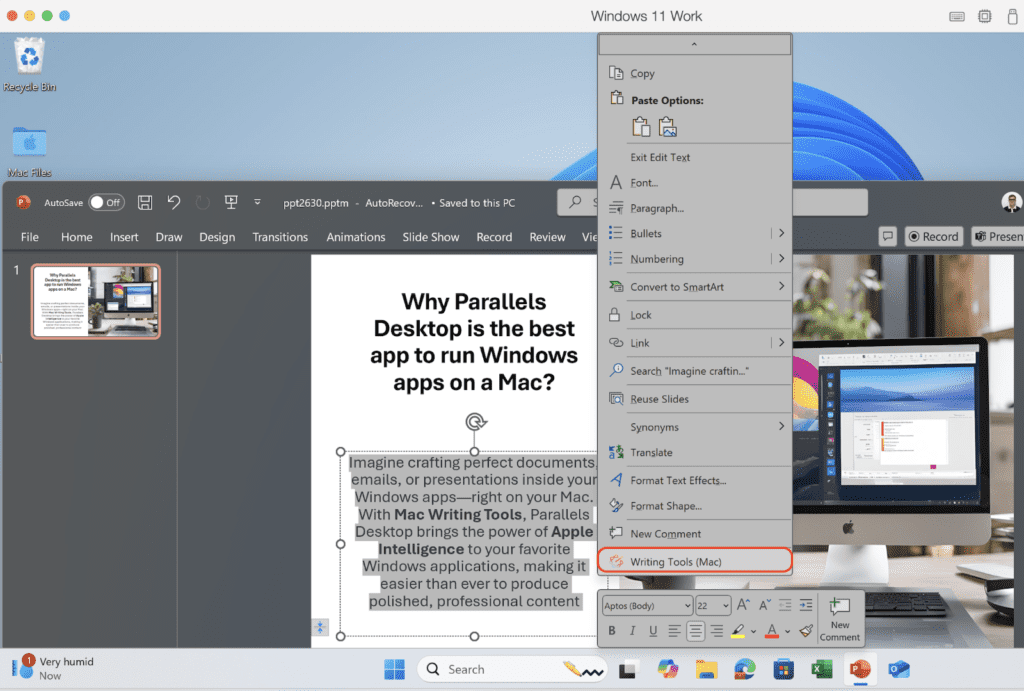
You can create, edit, and present your presentations just as you would on a traditional laptop with Parallels Desktop for your Chromebook.
By supporting advanced features like file sharing between your Windows and ChromeOS environments, you can access all your files and presentations easily.
Whether you’re working on a group project, creating a professional presentation, or just exploring your creative side, Parallels Desktop makes using Microsoft PowerPoint on a Chromebook possible.
Microsoft Excel is a must for many, and with Parallels Desktop, you can dive right into your spreadsheets on your Chromebook.
With Excel on Chromebook, you don’t have to settle for anything but the world’s favorite spreadsheet software.
It offers full access to the app’s many features so you can bring data to life and tackle formulas directly on your lightweight device.
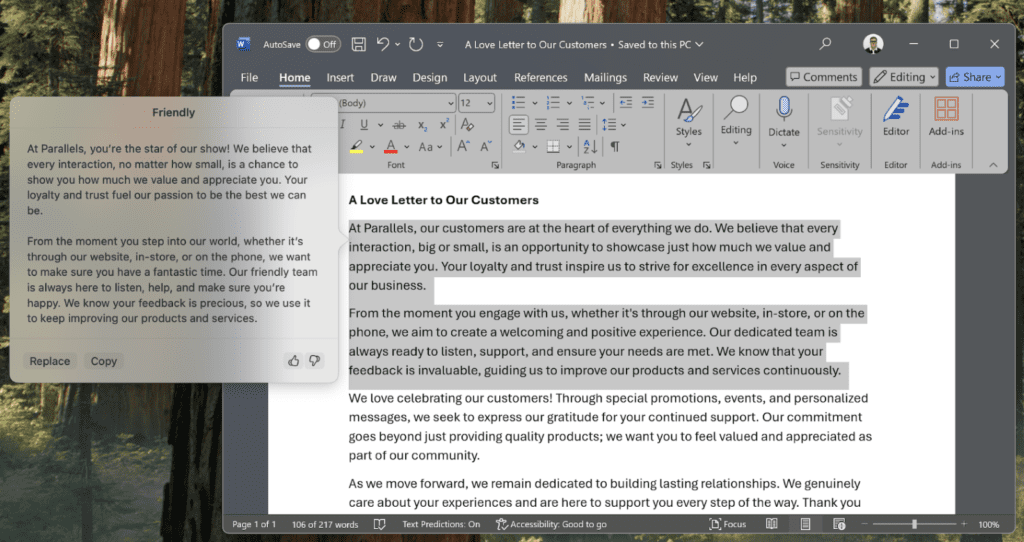
Whether you’re taking notes or writing a novel, Microsoft Word is the go-to app.
Although there are many alternatives to the software, Word remains the favorite for many.
Luckily, you can use the full-fledged Microsoft Word on your Chromebook through Parallels Desktop.
The virtualization software allows you to access Word and use all its features exactly like you would on a regular laptop or MacBook.
If you’re a Chromebook user, you need to know about Chromebook Developer Mode—the key to unleashing your Chromebook’s full potential.
It unlocks Google ChromeOS and enables access to otherwise hidden and locked practical functions.
Developer mode opens the file system to the user and removes the device’s boot locker, which is used to prevent users from installing an alternative operating system.
That allows you to access advanced settings, install your own applications or even use an alternative operating system.
Using Chromebook Developer Mode is almost equivalent to jailbreaking your iPhone or rooting your Android device.
In the same way, the system’s user locks are removed to open a whole host of new options.
Chromebook Developer Mode gives you more ways of working with your Chromebook, rather than only being able to work within the restrictions Google imposes on users.
Despite the name, Developer Mode is not intended only for development work. Instead, it removes restrictions, enabling third-party applications and third-party operating systems for Chromebook users.
By default, Chromebooks are limited to applications from the Google Play Store and (on many devices) Linux applications enabled by the relatively new, optional Linux subsystem for Chrome OS.
With Developer Mode, users can install applications from any other source or install Linux as the primary operating system and turn their Chromebook into a Linux laptop without the software limitations of ChromeOS.
Developers can test and debug applications with different operating systems or use Linux as a development environment.
Users who aren’t developers also gain the freedom of your choice for their operating system on Chromebooks.
If you are to choose between a Chromebook or a laptop, you are looking at two vastly different types of devices.
The key takeaway is that they cater to different needs and different work styles. What works well for a student may not be the best option for a filmmaker.
Some of the benefits of choosing a Chromebook are its budget-friendly, lightweight, easy-to-use design, and battery life long enough to last the day.
Laptops remain the popular choice for those looking for high-performance machines with loads of customization options and who aren’t too worried about pricing.
Even though Chromebooks’ functionality has some limitations, there are many opportunities to make them more functional than they appear to be at first glance.
Curious about using a Chromebook but still need your Windows apps? Try Parallels Desktop on your Chromebook for full access to your favorite tools.
The post Chromebook vs laptops: A comparison appeared first on Parallels Blog.
]]>The post Introducing the new Parallels Desktop Management Portal appeared first on Parallels Blog.
]]>With the launch of the Parallels Desktop Enterprise Edition, the Parallels team is taking that experience to a new level.
One aspect I’m particularly excited about is the new Management Portal available in the Enterprise Edition.
This portal is designed to streamline virtual machine (VM) management, deployment, and monitoring for IT administrators.
Are you curious about what this new portal offers and how it can simplify your workflow? Let’s dive right in!
Try Parallels Desktop Enterprise Edition now!
The Parallels Desktop Management Portal is a cloud-based service built to make life easier for IT teams managing large-scale deployments of Parallels Desktop within their organizations.
It’s tailored for customers who have the need to manage 30 or more Parallels Desktop licenses, and need a more advanced, centralized way to handle their entire virtualization environment.
With just a few clicks, this new portal lets administrators deploy VMs efficiently, control Parallels Desktop installations, monitor what users are up to, and set policies that apply across the board.
The Enterprise Edition also adds flexibility with hybrid licensing, letting you choose between per-user and per-device licensing to suit your needs.
Golden images let IT administrators create pre-configured VM images that can be deployed to end users in a matter of minutes. This feature eliminates the need for configuring machines individually, speeding up deployment time and ensuring every machine is set up the exact same way. Administrators can also pre-install the needed applications and settings inside the VM to provision to their users.
The Management Portal gives administrators complete control over how Parallels Desktop is used. Administrators can enforce policies like restricting users to corporate VMs, preventing VM deletion, or limiting access to a single VM. These settings provide a granular level of control, ensuring that users stick to the organizational guidelines. Policies can also be enforced based on user groups which allows admins to create a separate and unique policy for each group.
Monitoring VMs and their usage has never been easier. The portal gives you real-time insights into user activity, helping you stay on top of compliance and manage resources more efficiently. This feature is especially helpful when overseeing large teams and making sure policies are followed.
A standout feature of the new Parallels Desktop Enterprise edition is its hybrid licensing model, which supports both per-user and per-device activation. This flexibility is ideal for organizations that need to accommodate various user types and licensing preferences.
Managing individual licenses and VMs can be time-consuming and prone to errors. The Management Portal eliminates these issues by centralizing control, allowing admins to deploy, monitor, and manage everything from a single dashboard.
With golden images and setting up policies within the portal, admins can roll out new VMs in minutes rather than hours. This speed is crucial in environments where new users or machines need to be onboarded quickly without sacrificing compliance or security.
Whether your organization has 30 or 300 employees, the Management Portal grows with you. Thanks to its hybrid licensing model and centralized controls, handling even the most significant deployments remains smooth and hassle-free.
The initial release of the Management Portal is already packed with powerful features, but there is so much more to come.
Support for SSO activation has been added in version 20.2 of Parallels Desktop Enterprise Edition, allowing for seamless integration with your existing identity provider. The Parallels team is also working on support for multiple golden images and improved group management, making the portal even more versatile for large, complex environments.
The new Management Portal is now available in the new Parallels Desktop Enterprise Edition. Explore how it improves efficiency for IT admins in our on-demand webinar, which includes a demo of this simple, intuitive platform for managing all your Parallels Desktop instances.
Access the webinar to learn how the new Management Portal enables IT admins to save hours of work and improve consistency, accuracy, and end user satisfaction.
Here are just a few of the features and capabilities you’ll explore:
If you’re an existing Parallels Desktop Business customer and would like to explore these new features, upgrading to the Enterprise Edition is simple. Just reach out to your Parallels sales representative to start a trial or speak about how the Management Portal can revolutionize the way you manage VMs in your organization.
For more details, including a full admin guide and setup instructions, visit the Parallels Desktop Enterprise Edition Admin Guide.
The post Introducing the new Parallels Desktop Management Portal appeared first on Parallels Blog.
]]>The post Parallels Desktop 20.1.0: AI integration, Enterprise strength appeared first on Parallels Blog.
]]>Now, I’m excited to introduce our latest update — Parallels Desktop 20.1.0.
This update brings new features, enhancements, and critical fixes that we know you’ve been eagerly awaiting.
A few weeks ago, Apple released macOS 15, which brought with it one of the most anticipated features — Apple Intelligence.
I know many of you rely on Windows office applications for your daily tasks, so we’re thrilled to introduce an exciting new integration that works hand-in-hand with Apple Intelligence: Writing Tools for Windows Apps.
What does this feature do?
It’s simple.
Select any portion of text within a Windows application and either use the Command + Shift + W shortcut or go to the Edit menu in your macOS menu bar and select Writing Tools.
With Writing Tools in Windows Apps, you can:
And the best part?
You can use this feature in any mode — whether it’s windowed, full-screen, or Coherence mode, giving you the freedom to stay focused and productive regardless of how you prefer to work.
I’m also proud to announce that Windows Server 2025 will be fully supported in Parallels Desktop as soon as it’s released.
This marks the first time a server OS is supported in Parallels Desktop for Apple silicon Macs — an incredible milestone.
While Windows Server 2025 is still in preview, you can start experimenting with it if you already have an ARM-based image.
Go ahead and put it to the test!
Of course, every great piece of software has its hiccups, and the team works hard to address issues quickly.
The release of version 20 surfaced a significant issue on Apple silicon Macs where some macOS applications (like Safari and Preview) set as default in Windows 11 were not functioning correctly within certain apps, such as Microsoft Outlook (classic) and Microsoft Excel.
Links and attachments weren’t opening as expected in Safari or Preview, but with 20.1.0, this issue is now resolved.
Our brilliant Engineering team has also fixed a key issue that was preventing Rosetta emulation from working properly in Linux virtual machines on Apple silicon Macs running macOS Sequoia.
With the 20.1.0 update, your Linux machines are back to running seamlessly, just the way you expect.
Did you know that if you run your Windows virtual machine in Coherence view mode and have multiple documents open in Microsoft Word, you can swipe up with three fingers to easily switch between them!
It’s a seamless way to boost your productivity.
New to Parallels Desktop for Mac? Get your 14-day free trial of Parallels Desktop now.
The post Parallels Desktop 20.1.0: AI integration, Enterprise strength appeared first on Parallels Blog.
]]>The post How to check storage and free up disk space on your Mac appeared first on Parallels Blog.
]]>Apple’s longstanding MacBook line has a dream-like appeal; its stellar design sensibility suggests nearly limitless possibilities.
Apple’s willingness to buck trends also results in some stubborn decisions. Notably, it has stripped audio jacks from iPhones, insisted on a proprietary lightning cable, and typically charges a premium for memory and hard drive space.
When an additional 512 GB can cost $600—like the 16-inch M3 MacBook Pro—you may opt to make do with less.
How do you free up disc space on your Mac? Read on to learn how to check storage on your Mac to avoid stuffing your hard drive to the brim. Use Parallels Toolbox for Mac and Windows to greatly simplify hard drive management—there are a ton of extra handy tools included too!
There are a few ways to check the storage on your Mac’s hard drive. The steps differ depending on your MacOS version.
Which MacOS are you running? You can check by hovering over the top menu bar, clicking the Apple icon on the far left, and then clicking About This Mac.
Instructions will differ if you have Ventura or later updates, including Sonoma or Sequoia, or if you have Monterey and earlier releases.
Our first method begins with the same steps as above. Navigate to About My Mac once more.
For Monterey and earlier: You’ll see a rectangular-shaped window with several tab options. Click Storage, and the following window will present a bar chart breaking down used and available space, sorted by file types (Like media, documents, and applications).
For Ventura and later: These users will see a smaller About My Mac window with a single button: More Info… Once clicked, you’ll arrive at the About tab in system settings. Scroll to the bottom and click Storage Settings.
Here, you’ll spot a bar chart illustrating your current storage usage, with different file types color-coded. Red represents documents, orange denotes applications, gray describes system data, and black is for free space.
Accessing System Settings is simple. Click the Apple icon in the top menu bar and hit System Settings.
Scroll down the left-hand menu bar and click Storage. You’ll then arrive at the same Storage Settings window.
Next, I’ll use the Storage Settings window to free up much-needed hard drive space.
Below the bar chart, you’ll see a table of file types and the volume of space they occupy. Clicking the encircled i for “information” next to each will launch a pop-up detailing that category’s largest files in descending order.
Typically, most of your space will be dedicated to apps or documents.
Let’s look at my MacBook Pro’s hard drive.
It looks like my Applications folder is stuffed. The largest apps are either video games or office tools. To save some space, I’d probably delete the games Ultros and Terra Memoria—I already beat them anyway.
I’ll also ditch Microsoft PowerPoint; I rarely use it, and Google Slides is free and good enough for my purposes.
Now, I’ll navigate to my document storage tab since it’s the largest file type by far.
At the top, you’ll see Parallels Desktop, which I use to virtualize Windows 11, play Windows games, and use Windows applications.
I’ll keep that, and instead I’ll delete a bunch of somewhat smaller files, such as application setup files, corrupted downloads, and already-extracted compressed files.
And look! I saved another 5 gigabytes.
Apple has developed a range of simple tools to help you manage hard drive space.
Here’s how to use them to your advantage.
It’s easy to forget your trash bin. It’s hidden away and easy to overlook, and it can quickly hoover up space.
Use Optimize Command to set your trash bin to empty every 30 days (or a time frame of your choosing). This setting automatically deletes trash bin files after 30 days. I highly recommend using it. That said, if you frequently find yourself dumpster diving for needlessly discarded files, leave it off.
The average inbox is positively stuffed with messages—one study found respondents held an average of 8,024 emails, with 20 percent holding 21,000 plus.
If you’re not looking to hoard a massive volume of junk mail, you can save considerable space.
Open Mail, then right-click the mailbox containing the most messages (whether it’s your Inbox, drafts, or Sent folder).
Select Erase Deleted Items, then Erase Junk Mail. Voila!
Monterey or earlier: Those still on macOS Monterey or earlier can use Reduce Clutter, a tool that helps you sort through files to determine what can be deleted. It’s halfway down the Recommendations window.
After clicking Reduce Clutter, start by selecting Review Files.
You’ll see five tabs: Large Files, Downloads, Unsupported Apps, Containers, and File Browser, which may help you decide what to delete.
Once you select a tab, you’ll see a list of the largest associated files in descending order. If you spot an expendable file, right-click and select Show in Finder. MacOS will open the folder containing the file. Select Delete to remove it.
Parallels Desktop, our virtual machine solution, enables you to run Windows apps on Mac (and so much more). It also provides handy MacOS tools in Parallels Toolbox (included in your subscription).
For instance, Clean Drive scans your hard drive for a wider array of file types and locations, including cache files, mobile app data, and iTunes temp files.
First, download and install Parallels Toolbox. Open the Toolbox, click the Library tab at the top, and scroll down until you see Clean Drive. Once clicked, the tool will scan your drive for nine types of overlooked files and recommend deletions.
Despite just running Apple’s tools previously, I found a whopping 5.51 GB free. Time to download more games I’ll later forget to delete.
Even the confirmation window looks slick. https://www.parallels.com/products/toolbox/
Whether you opt for more or less storage, you’ll be glad you learned how to check your Mac’s storage and how to free up disk space.
Now go forth and continue to download mountains of .dmg files, videos, and large PDFs—that is until you need to make space for more.
Parallels Toolbox includes a plethora of extra applications designed to make Mac management easier. With your Parallels Desktop for Mac subscription, you can access over 50+ tools!
The post How to check storage and free up disk space on your Mac appeared first on Parallels Blog.
]]>The post How to zoom in and zoom out on Mac appeared first on Parallels Blog.
]]>Though users know not to expect labyrinthian file structures and endless settings, they often need clarification on Macs can and can’t do.
As such, many need help learning handy features, like how to zoom in on Mac and how to zoom out. This part is especially difficult for new users and those with accessibility needs. Ironically, Mac’s accessibility settings could be more accessible.
In this write-up, I’ll walk you through various methods you can use to zoom in and zoom out on your Mac, plus explain how to check your Mac’s resolution.
Parallels Desktop allows your Mac to run Windows, helping you run many Windows-exclusive games and applications. Download a free trial of Parallels Desktop.
Screen size may be one setting among hundreds, but the sizing and spacing of on-screen elements can dramatically improve your user experience.
Keyboard shortcuts may be old-school but making hotkeys for zooming in and zooming out on Mac can save you a lot of time.
First, though, you must flip a switch in System Settings.
Now that you’ve enabled zoom shortcuts, you can use these three by pressing down each key at the same time:
However, these commands don’t work within most applications and browsers. In such cases, use these key combinations:
Now you know how to zoom out on Mac with the flick of a switch.
Apple’s trackpad sports a broad surface area and multi-finger recognition, allowing snappy and intuitive screen control. Zooming in on Mac is as simple as a pinch.
Of course, you’ll need to adjust MacOS settings to use it.
How can you zoom in and out on Mac using your mouse’s scroll wheel or your trackpad’s gestures?
It’s easy, but first, I’ll need to enable some accessibility settings.
Now, simply hold your chosen modifier and scroll away (e.g., up to zoom in, down to zoom out).
Mac’s Full Screen View lets you pull an application window into a separate screen, dedicating every square inch to a single application or window.
There is no need to drag, minimize, or maximize windows, and there is no distracting app drawer, either. Simply use a swipe gesture or key combination to return to your original desktop sans the now-full-screen app.
There are a few ways to access full-screen mode.
This one only takes a click. Hover your mouse over the top left corner of whatever window you want to expand and click the green button.
Exit Full-Screen mode by clicking the same button.
And you’re done!
You’ll spot the View drop-down menu on your taskbar in most applications.
All you need to do is click View, then Enter Full Screen.
Exit by clicking View again. Now select Exit Full Screen.
Keyboard shortcut warriors also have a shortcut they can use.
Press ESC to exit your Mac’s full-screen mode.
What if you like the improved focus of full-screen mode but don’t want to swipe back and forth between desktop views?
Tiling windows lets you view two windows side-by-side within one full-screen view.
You can access it by hovering your pointer over the green button on your window bar—or pressing the button and holding it down. A menu will pop up with these three options.
Once you select one side, MacOS will fill the blank side with all your open windows. Click the desired window to have it occupy the other half of the screen.
I love this feature. A writer like me can read web research in one half and write in a text editor on the other. Now, I have more time for quality research.
Your screen’s resolution determines the size and spacing of almost every on-screen element.
I’ll access resolution settings by clicking the Apple taskbar menu and selecting System Preferences. Scroll down to the Displays tab and enable the Scaled resolution setting.
The Displays window lets you select between a few size options with your current resolution highlighted. If you’d like to zoom out or zoom in, click each resolution setting to find your ideal visibility-to-screen space ratio.
It’s easy to forget that Mac’s simplicity hides a wide range of features, many of which can transform the user experience by making things simpler, easier, and more accessible.
Zooming in and out is a perfect example. Enlarging text and visuals might make you feel old, but its benefits vastly outweigh any age shame.
Parallels Desktop allows your Mac to run Windows and so much more, helping you run many Windows-exclusive games and applications. Try it today.
The post How to zoom in and zoom out on Mac appeared first on Parallels Blog.
]]>The post What’s new in Parallels Desktop 20 for Mac appeared first on Parallels Blog.
]]>The biggest highlight is the new Parallels AI package, offering secure, downloadable pre-packaged virtual machines to quickly enhance AI developing skills in an offline environment.
Parallels Desktop 20 is also ready for macOS Sequoia and Windows 11 24H2 and introduces a new Management Portal as a part of the new Enterprise Edition. It offers numerous updates for Windows, macOS and Linux VMs.
Try Parallels Desktop 20 for Mac now – it is better than ever.
PS. Read all the way to the end for a fun Easter egg!
The new Parallels Desktop 20 for Mac supports the upcoming macOS Sequoia (when released), improves the application stability on this operating system, and allows Mac users to enjoy AI-powered Writing Tools with Windows apps (requires macOS Sequoia 15.1).
Preview macOS Sequoia 15 using Parallels Desktop.
This version decreases the use of deprecated APIs for content capture (such as CGDisplayStream and CGWindowListCreateImage), which now trigger system alerts that indicate they might be able to collect detailed information about the user. Instead, it moves to the recommended macOS API to ensure security and compliance.
In addition, macOS Sequoia provides the ability to sign in to Apple ID in macOS virtual machines on Apple silicon!
This long-awaited improvement allows developers to fully leverage macOS virtual machines for building and testing software in an isolated environment.
With Parallels Desktop for Mac, it is so easy to install a new macOS virtual machine on Apple silicon.
Improving the stability and integration of this major Windows 11 update in a virtual environment has been a major goal since Windows 11 24H2 appeared in the Canary channel in early 2024.
These efforts include fixes for the NVMe driver, express Windows 11 installation on Intel-based Mac computers, mouse cursor positioning, and a fix for the dynamic resolution to sustain the ability to resize a Windows 11 VM window with automatic resolution adjustments.
From the Microsoft side, optimizations for the new major Windows 11 version 24H2 ensure users’ workflows remain uninterrupted while running legacy Windows apps (built for the Intel platform) and get up to 80% performance boost[1] for certain computational workloads thanks to the improved Prism emulator built into Windows 11 on Arm OS.
Contrary to popular belief, most Windows apps run just fine in Windows 11 on Arm – the version of Windows OS users run on a Mac with Apple silicon.
With the increased adoption of Apple silicon, Parallels Desktop became an essential tool for many professionals who need access to the Windows OS ecosystem – our customers happily run more than 200,000 Windows apps on their computers.
Parallels is proud to be the first Microsoft-authorized solution for running Arm versions of Windows 11 on Mac, helping to amplify the adoption of the Arm platform by software developers.
The latest release offers improved compatibility with ArcGIS Pro, LabVIEW, Ninja Trader, and other applications so you can now seamlessly install and run on a Mac with Apple silicon—all with the help of Parallels Desktop for Mac.
It’s also great to see software companies shift their strategy and start delivering product updates that run natively in Windows 11 on Arm which means more apps will soon become available for Apple silicon users. Recent examples include Malwarebytes ThreatDown, Opera browser, Adobe Illustrator, LibreOffice, and others.
The Parallels Desktop 20 release reflects our ongoing commitment to delivering the best environment for developers to build, automate, and test solutions on every major operating system (Windows, Linux, and macOS).
Let’s start with the Visual Studio Code extension for Parallels Desktop. This tool allows you to create and manage your Parallels Desktop virtual machines from a single user interface — and it’s becoming a popular choice, with over 50,000 downloads and counting.
You can also join our Discord server to ask questions, share your experience, and get help from the community.
For developers and DevOps who run macOS virtual machines on a Mac with Apple silicon, the new version delivers:
The Parallels Desktop team has listened to your feedback about the issues when running the newly released kernels inside Parallels Desktop virtual machines.
It’s well-known that the newest Linux kernels can sometimes be unstable and lead to compatibility challenges. However, we didn’t just acknowledge the issue — we took the first step to solve it.
Through careful analysis, the team discovered that nearly 50% of the reported issues were related to the Shared Folder driver operating within the kernel space.
Tackling this required adopting the high-level FUSE API, which should significantly reduce installation issues caused by kernel API changes in the near future.
This enhancement is designed to improve compatibility and ensure seamless support for future Linux distributions, reaffirming our commitment to providing you with a reliable and consistent virtualization experience.
This change also allowed us to improve performance for certain operations. You will feel the speed improvements when working with the volumes shared from Mac — now up to 4x faster than before[2].
I’m excited to announce a significant update that transforms how IT administrators manage Parallels Desktop virtual machines across their organizations.
The changes are based on user feedback, particularly how IT administrators have expressed the need for more advanced tools to manage their Parallels Desktop environments.
Common requests included the ability to control virtual machines remotely from a single interface, centralized monitoring of VM performance across the entire organization, and a more convenient way to deploy the virtual machines to endpoint Macs.
The Parallels Desktop team has taken this feedback to heart and are thrilled to introduce the Management Portal, which addresses these needs head-on.
To complement the release of the Management Portal, the Parallels Desktop Enterprise Edition is now available—it’s our most advanced offering yet.
Created for organizations that need more control, visibility, and efficiency in managing their large-scale virtual environments, the new Edition unlocks access to the new Management Portal.
And that’s just the beginning. The Enterprise Edition is packed with enhancements that will empower your IT team to operate more effectively and efficiently than ever before.
Stay tuned for further updates! If you’re eager to be among the first to experience these new capabilities, reach out to our sales team today for more details and to arrange an exclusive demo: https://www.parallels.com/products/desktop/enterprise/.
In the world of IT management, seamless software deployment is crucial.
However, some IT admins using Parallels Desktop have recently faced a challenging roadblock when deploying the application through some Mobile Device Management (MDM) providers.
The issue stemmed from the bundle structure of the deployment package, which, while powerful, was not widely supported by many MDM providers, e.g., Microsoft Intune.
As a result, admins were forced to find workarounds, such as deploying the software via custom scripts. Additionally, our customers reported the package can’t be run on Mac computers with macOS Sequoia.
The latest release introduces support for converting the existing bundle package into a flat package format, which is compatible with most MDM providers.
This simple yet powerful change ensures that IT admins can now deploy Parallels Desktop without resorting to complex scripts.
The flat package format maintains all the essential capabilities of the original bundle, including the ability to pass a license, configure policies, and deploy VMs with precision.
For MDMs with file size limitations, admins can now link a cloud-stored VM in the package, streamlining large deployments. The option to include the VM file in the package remains available.
To further enhance the deployment experience, Parallels has added the ability to always deploy the latest version of the Parallels Desktop application without needing to bundle the DMG file with each package.
This ensures that IT admins can use the time they used to spend on building a new package on other crucial tasks.
These advancements mark a significant milestone in our ongoing commitment to improving the IT admin experience. With these new features, deploying Parallels Desktop across a network of Macs is simpler and more flexible than ever before.
Can’t wait? You can give it a try now: https://www.parallels.com/products/business/download/.
Many years ago, a small group of enthusiasts embarked on a journey to create a product that, year after year, captured the hearts of more and more users worldwide: be it a Windows lover, a student, a developer, or an IT admin – Parallels is proud to serve so many different people worldwide.
Fun fact: Parallels Desktop launched publicly in June 2006 with version 2.5, which makes this release not an anniversary by age but rather yet another round number release. Stay tuned for anniversary easter eggs in 2026 .
Years later, Parallels Desktop became the leading solution for running Windows, Linux, and even macOS in a virtual environment – the only solution authorized by Microsoft to run Windows 11 on a Mac with Apple silicon!
And this is only the beginning. Look for more enhancements in the near future, making deployment and management an even smoother process for IT admins worldwide. Stay tuned for what’s next!
New to Parallels Desktop for Mac? Get your 14-day free trial of Parallels Desktop 20.0.0 now.
The post What’s new in Parallels Desktop 20 for Mac appeared first on Parallels Blog.
]]>The post How to find and delete duplicate files on your Mac appeared first on Parallels Blog.
]]>This article is a step-by-step guide to find and remove duplicate files, a vital hygiene practice for maintaining an organized, efficient, and smooth-running workspace.
Explore Parallels Toolbox (included in your Parallels Desktop subscription) to learn how to dedupe files and free up your hard drive in mere minutes.
Users can open Parallels Desktop on a Mac to find and remove duplicate files with the built-in “Find Duplicates” tool.
If you’re using Parallels Toolbox, here’s how to find and remove duplicates on a Mac.
2. Locate and launch the “Find Duplicates” tool within Parallels Toolbox
3. Choose the folders or drives that may contain duplicates—you can even scan multiple locations simultaneously
4. Initiate the scanning process; the tool will search for duplicate files across your selected locations
5. Once the scan is complete, you’ll receive a list of duplicate files—the results are typically organized by file type, making reviewing a whole lot easier
6. Review the duplicates carefully; the tool lets you preview files before deletion to ensure you don’t remove important content
7. Select the duplicate files you want to remove; Parallels Toolbox offers “smart” selection options to help you choose which duplicates to delete
8. After selection, remove the duplicates using the “Move to Trash” option—it’s that easy
To mitigate lengthy processing time, consider scanning multiple smaller sections of your drive rather than tackling the entire system simultaneously.
MacOS does not have a built-in duplicate file finder. If you can believe it, that’s one thing Apple has not developed!
Because of this, users must rely on manual methods (ack!) or a trusted third-party application like Parallels Desktop to identify and remove duplicate files.
Finder’s Smart Folders provide a powerful tool for those who prefer a more hands-on approach.
Finder’s Smart Folders create dynamic folders that display files based on specific search criteria, giving users full control over their file management.
Users can manually sift through potential duplicates by setting parameters such as file type, date created, or file size.
However, this process can be tedious and may only catch some things, especially if files have slightly different names or formats.
Yes, it is safe to delete duplicate files on your Mac if you need storage space. Be sure to follow a few basic guidelines so you don’t find yourself in a pickle.
Here are examples of files safe to delete on Mac.
The long and short of it is that you can optimize your hard drive by deleting duplicate files, but it really is best practice to use a reputable tool like Parallels when you do it.
And don’t skip reviewing your files before deleting them!
This step will help ensure you don’t accidentally remove critical data and have to spend hours trying to recreate all of it (although the Find Duplicates tool does include a “restore” option in some cases).
The simplest way to identify (and remove) duplicate content on Windows 10 is to use the built-in features or third-party software like Parallels.
If you choose to brave the built-in Windows features, here are some things to try:
The Find Duplicates feature inside Parallels Toolbox can be used on Mac and Windows to search and delete duplicate files without hassle.
This Parallels feature automatically searches every drive and folder to quickly identify the identical file taking up your disk space and delete it. Other software may not find identical files named differently, but Parallels will!
To start using the Parallels Toolbox to find duplicates, just:
If you’re visually oriented, watch this video to see Parallels Toolbox in action.
Microsoft does not provide a built-in duplicate file finder specifically for Windows 10.
Users typically need to rely on third-party applications (like Parallels!) to locate and remove duplicate files effectively. While Windows Explorer and PowerShell can identify duplicates manually, they do not offer a dedicated tool.
Everyone’s a fan of happy endings and choosing Parallels Toolbox to remove duplicate files is a good decision for several reasons.
Parallels Toolbox offers a comprehensive suite of over 50 tools designed to enhance your computer’s performance by efficiently managing storage space.
The “Find Duplicates” tool is quite powerful and enables users to trash redundant files that clutter the system, saving valuable disk space and helping speed up your Mac and improve overall system performance.
Additionally, this feature is simple to use and provides a straightforward interface that makes locating and deleting duplicates easy—even for non-tech-savvy users.
Finally, Parallels Toolbox integrates with Mac and Windows systems and supports many file types, making it a flexible and trusty tool for maintaining a clean and efficient digital workspace.
Try Parallels Toolbox for free (plus, it is included in Parallels Desktop subscriptions) and discover why millions of users trust Parallels to optimize the way they work.
The post How to find and delete duplicate files on your Mac appeared first on Parallels Blog.
]]>